Building a new Windows 7 machine with Intel Skylake chipset
October 25th 2016, 23:43 | Written by Konstantin KollAbout one month ago, the RAM in my old 2009 computer became faulty. I could fix it by removing 2 GB of RAM (leaving me with just 1 GB), but a new machine was desparately needed. Read on to learn about my hardware choices and how to assemble a new desktop PC these days.
Background
To give you a little bit of background, I used to assemble new PCs on a regular basis for friends and coworkers from around 2001 to 2008 while studying computer sciences and working on my PhD thesis. Since 2009 I've built only a single computer for myself, so I was definately out of training. A big shoutout to my highschool friend Kai Tubbesing for his support and his hardware recommendations!
Ballpark
When building a custom PC, the selection of appropriate hardware always depends on the requirements, such as the tasks for the new computer, the operating system, and lots of other things. After all, that's why people build custom computers for themselves: to get the best solution for their specific scenario!
Fortunately, I came to grips with the requirements very fast: I wanted to use Windows 7 as operating system. Though my old PC ran Windows XP, I felt comfortable to update to 7 now. I will never use Windows 8 or Windows 10, though—issues like privacy intrusion, forced updates, and a bizzare user interface with an ugly design each warrant their own blog posts, but I'll leave that for another day.
In addition to mundane tasks, such as browsing the web or doing email, the computer had to be outfitted for CPU-heavy tasks, such as compiling Flightmap or liquidFOLDERS as fast as possible. I do play some games occasionally, but Starcraft II is the most graphics-intensive one I own. Playing Starcraft II in full resolution and maximum detail was a nice-to-have feature, but not a hard requirement. I was also eager to introduce virtualization to our company to get rid of some cheap laptops that we've solely used as testbeds for software development.
Hardware choices
With the ballpark and all requirements set, the hardware choices fell neatly into place. At first, I wanted to wait for the new AMD Zen CPUs, which will be available in 2017. However, there will be no Windows 7 support for AMD Zen CPUs, and much more annoyingly, drivers for their chipsets. In conclusion I've settled for the Intel Skylake architecture—the last with full Windows 7 support.
For casing, I highly recommend the Silverstone SG01-F case. It's made of steel and aluminum, and looks gorgeous on anyone's desk. My old computer had the same case, and I am 100% satisfied with it! The case is discontinued now, so grab one while you still can. I bought a new one, so I didn't have to tear apart my old computer before the new one was completely ready to take over.
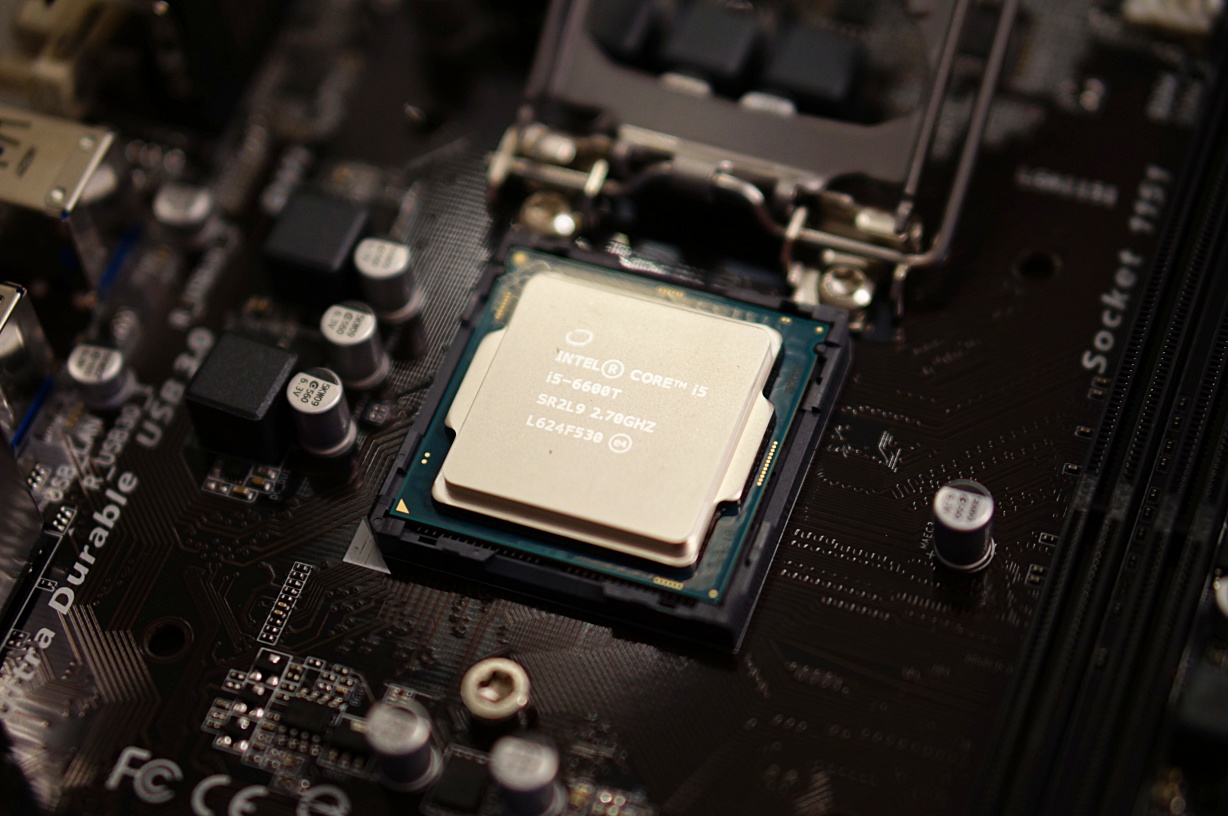
Since the case can only house microATX boards, things will get a bit cramped inside. That triggered two decisions: I needed a microATX mainboard, of course, and a low voltage CPU to keep the heat down. I've opted for the Intel Core i5 6600T CPU: it's a quad core processor that runs at 2.7 GHz (considerably faster than my old one), but has a TDP of only 35W (the “T” stands for low TDP). Be sure to get exactly this CPU, and not one without the “T” at 65W TDP, or one with a “K” that is designed for overclocking and gets even hotter!
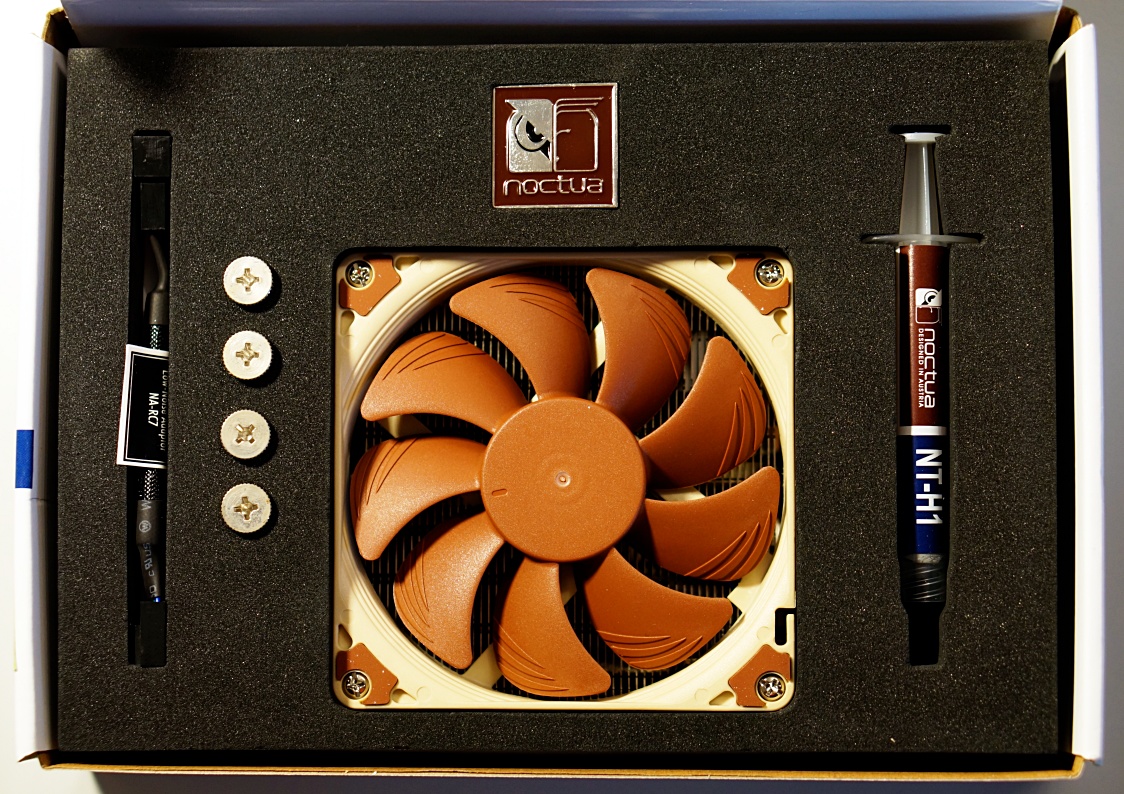
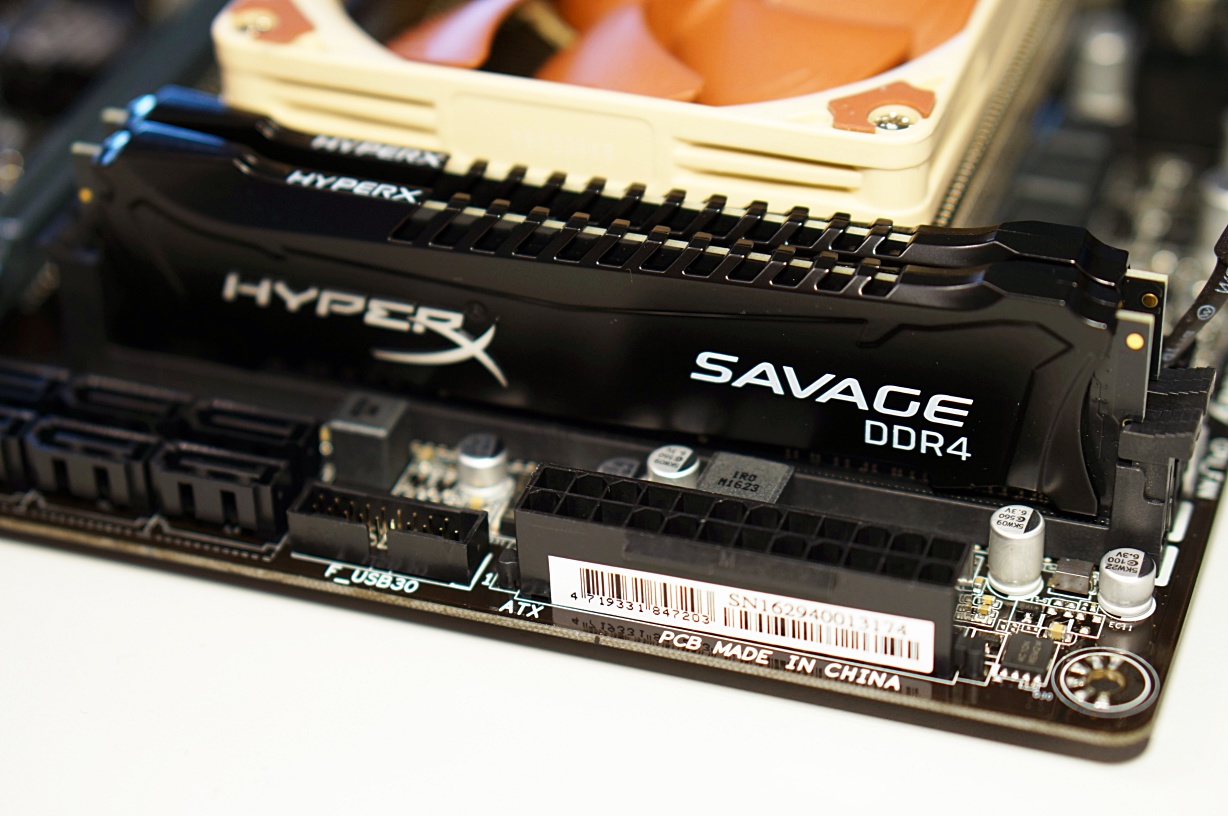
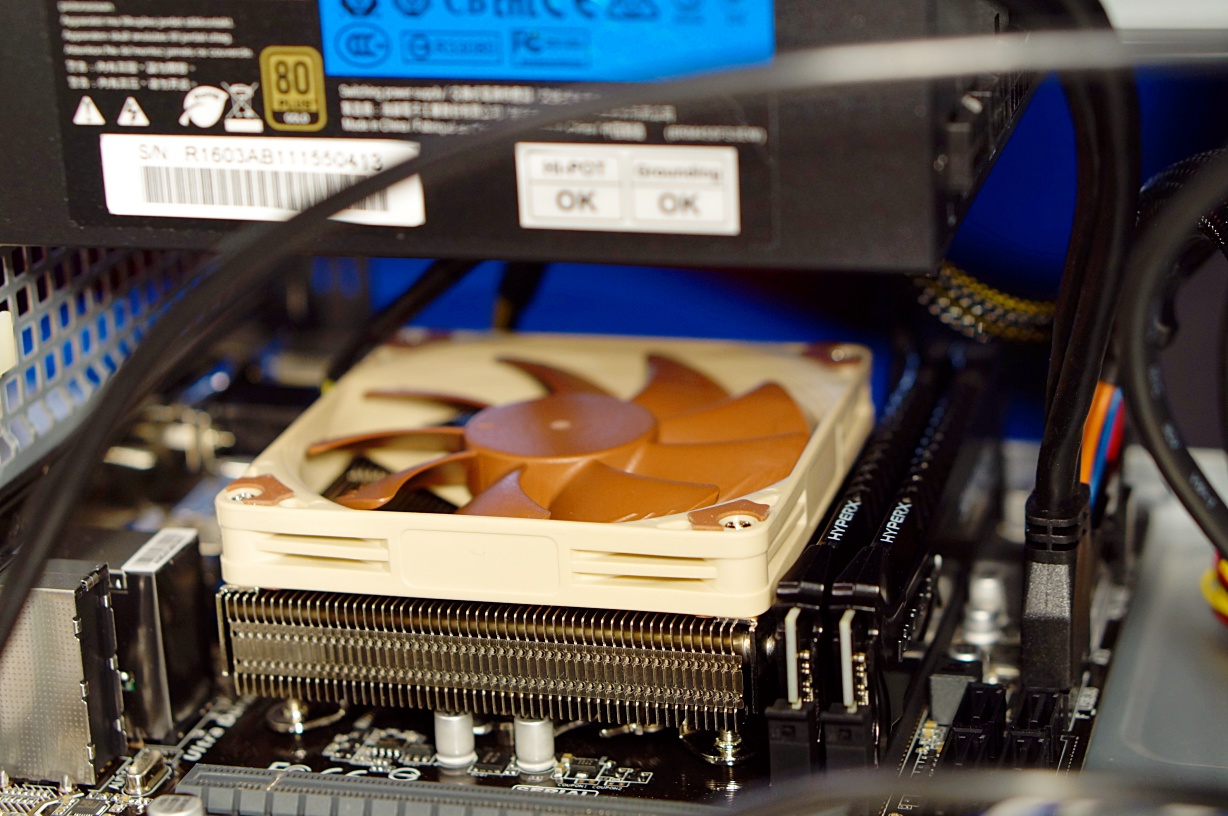
To accomodate the CPU in a very narrow case, I've bought a Noctua NH-L9i cooler, which is very flat, very quiet, very efficient, and also very expensive. It sets you back around $50, but as the RAM in my old machine died from too much heat, it's probably worth it. Speaking of RAM, I've bought 16 GB in 2 modules, each with its own heatsink. 16 GB is more than enough to run two virtual machines at once, the host operating system, and our development toolchain. It should be satisfactory for the next 10 years. I've forked out additional cash for a HyperX Savage DDR4-2133 kit, by the way: its CL13 timing means that it's a bit faster than most other RAM modules. That'll speed up CPU heavy tasks like compiling, which makes the extra expense worth it for me.
I've bought a rather cheap Gigabyte GA-B150M-D2V mainboard with the Intel B150 chipset for about $60. Now, I'm usually advocating against cheap mainboards, as that's probably the one component you won't ever change. However, that board meets all requirements, doesn't come with any fancy stuff that compromises stability, and I can say that it works just great! It also features 6 SATA ports (some cheap boards come with only 2 SATA ports).
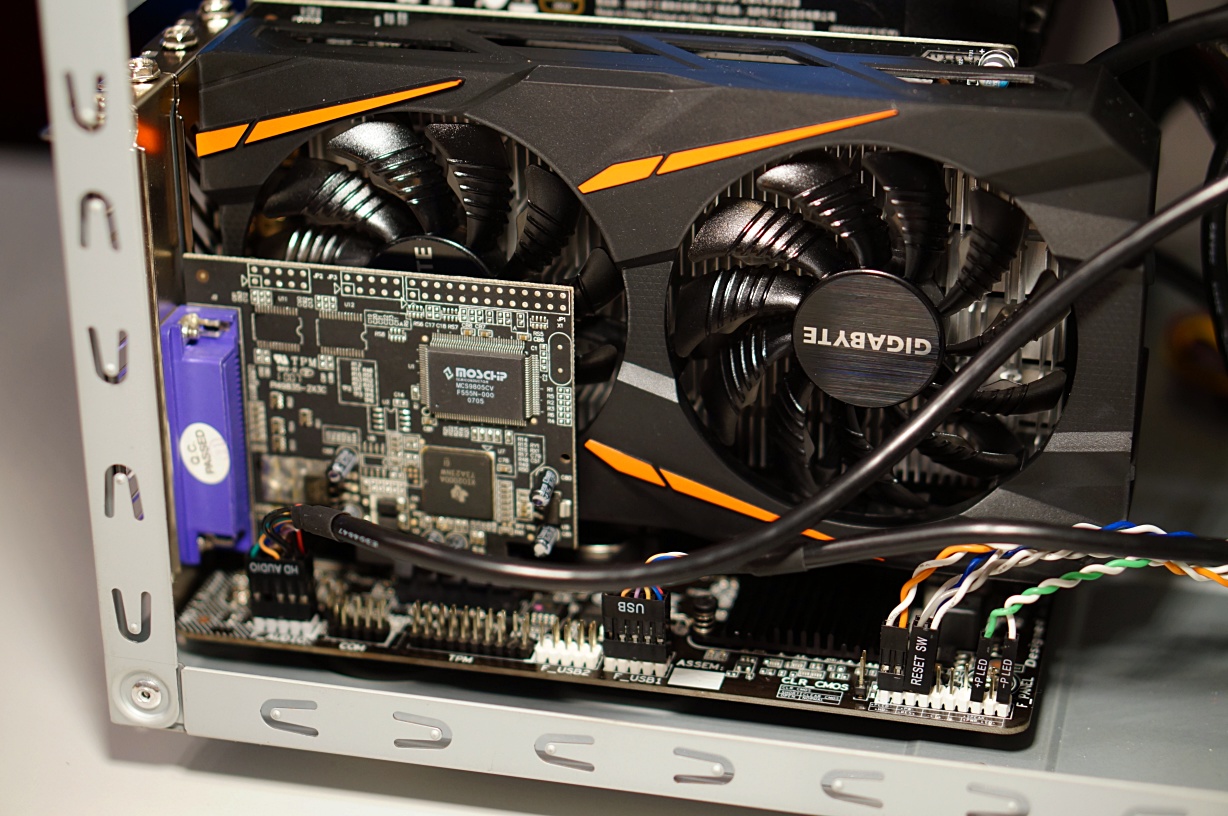
I was very happy to find out that AMD's brand new Polaris graphcis chips indeed do come with Windows 7 drivers. Since even my old computer could handle Starcraft II, there wasn't much need for improvement in the graphics department. I've selected AMD's Radeon RX 460 card for my new computer: it's about twice as fast as my old Radeon 7750, but a lot more power efficient. I bought a 4 GB model, by the way—2 GB cards with the same GPU are also available and a bit cheaper. The graphics card has a TDP of 75W, and does not need an extra power supply connector.
The hardware selection was completed with a Sandisk X400 SSD (256 GB), a 1 TB Western Digital Red SATA harddisk, and a few fancy red SATA cables. The WD Red series is intended for NAS systems, but works perfectly fine in desktop PCs. Everything gets powered by an efficient and quiet Seasonic G-Series power supply. The DVD burner is the only part that moves from my old computer (I need it for backups and the occasional movie).

Hardware assembly
Assembling the hardware was a rather straight-forward process, which is different from 10 years ago only in a few minor details.
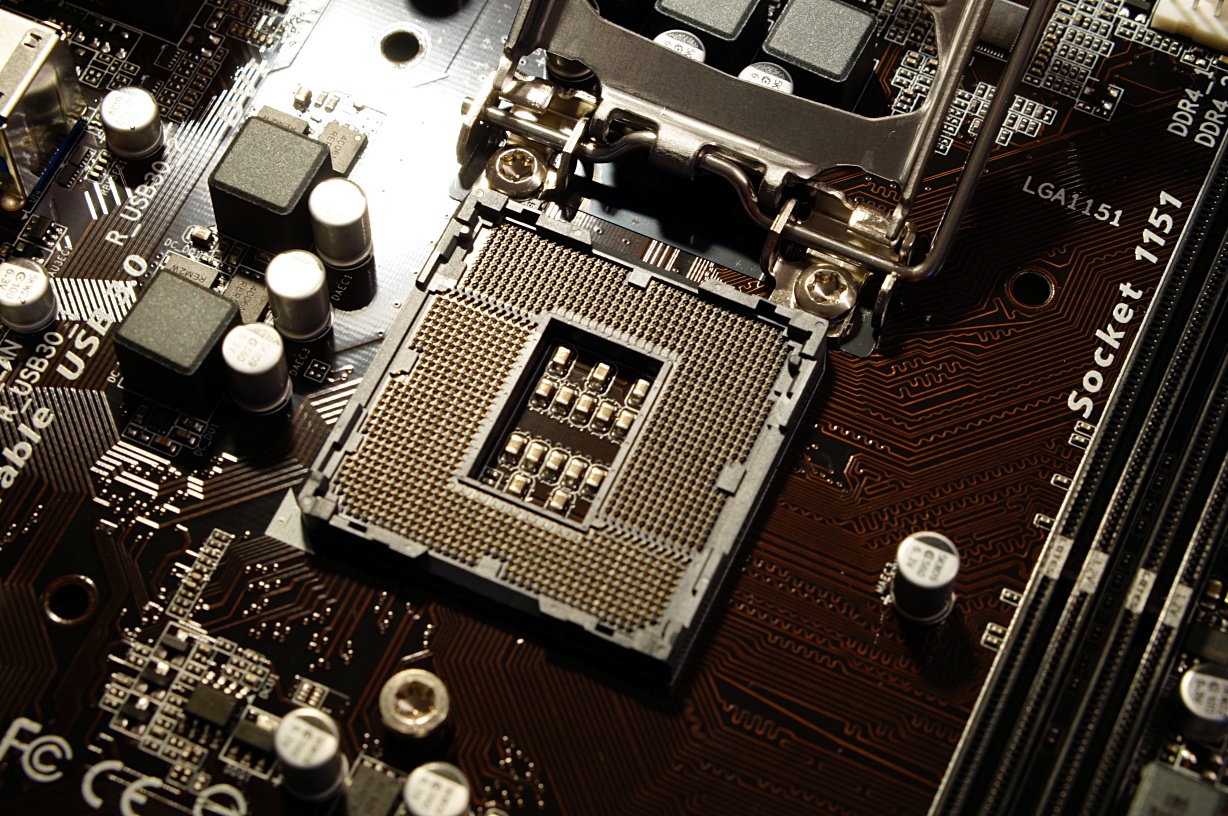
You begin with the CPU. Back in the days, the CPU chip would have lots of pins that would fit into the mainboard's socket. With the LGA1151 socket, things are different: there are no pins on the CPU chip; instead, they extend from the socket. That's good for Intel, as there will be no more CPUs with damaged pins. It's bad for mainboard manufacturers, as they have to deal with damaged pins now. But mainbaords are usually cheaper than CPUs.
The LGA1151 socket is protected by a plastic lid. Open the lever, and gently remove the lid. Keep the protective lid! You'll need it to protect the socket whenever you remove the CPU, e.g. when returning the board or selling it on eBay in a few years.
Then put the CPU on the socket. The golden triangle on the CPU indicates the orientation (it must be on the same corner of the socket that has been cut off a bit). There's really only one way to fit the CPU correctly, but please don't drop it onto the socket. After that, close the metal bracket using the lever. The CPU is now firmly installed into place.
Next comes the CPU cooler, made of a heatsink and a fan. My cooler does not have any thermal paste pre-applied, so I had to use the syringe that came with it to put some thermal paste directly on the metal top of the CPU. There's a lot of debate going on regarding the correct amount: if you apply too little, there'll be no thermal contact between the CPU and the heatsink. If you apply too much, heat is essentially blocked, and the thermal paste will leak at the sides (the heatsink will put a lot of mechanical pressure on the CPU and the socket). I'd say anything between the size of a bit more than one grain of rice and a bit less than a pea is right. The syringe definately holds much more thermal paste than needed!
After applying the thermal paste, mount the cooler. Coolers usually come with screws that have to be tied. My high-end cooler was manufactured to the specs, so I could tie the screws all the way. Beware of cheaper coolers: when you tie the screws all the way, you might end up with far too much pressure and damage the CPU and the mainboard! Use a lot of gut feeling here.
The next steps are putting the RAM modules in their slots, mounting the board in the case, and connecting the power supply. After that, put any additional PCIe cards in, and connect the drives. That's it, there's really not much you can do wrong!


Software
There's little to tell from the software side of things. Windows 7 Home Premium installed flawlessly, but only with a PS/2 keyboard attached. The xHCI USB ports and onboard ethernet adapter were only visible after installing the chipset drivers from the accompanying DVD. I really don't know what to do when the target machine would not have a DVD drive: either you have to attach one for the sole purpose of installing the required USB and network drivers, or you have to use another computer to pre-load the drivers on the harddisk before installing the operating system.
One other issue is noteworthy, however: the AMD graphics driver for the Radeon RX460 crashed whenever I tried to enable Aero Glass. It was only after SP1 got installed through Windows Update that Aero Glas was working fine. So, wait until Windows is fully updated before you install the AMD graphics driver!